Overview
This document should guide you through the process of using the Adam/Apax Utility to update and verify your Digital Filter settings.
Downloading the software
The Advantech IO module Utility can be downloaded from the Advantech website. For most installations, you will want to download the “Advantech IO module Utility V2.06.00 B51” version.
https://www.advantech.com/support/details/utility?id=1-2AKUDB
Connecting to your hardware
You will need to be on the same network as the OFS Hardware. Once you are on the same network and your computer is on the same IP Subnet range, you should be able to communicate with the devices.
- If connected to an OFS Router, you will need to enquire with OFS Support (support@ofsystems.com) on acquiring the Router's Wi-Fi details, connecting to the network, and then accessing the PLC via it's IP address, this will likely be 10.17.X.X or 10.18.X.X.
- If the PLC is connected to your network, you will need to identify the IP address that has been assigned to the PLC you wish to update.
Using the Advantech IO module Utility
Launch the Advantech IO module Utility, right click ‘Ethernet’ and select ‘Refresh Subnodes’. The IP address of your OFS Box, Teltonika Router or Onsite Router should now be available in this list.

You can now right click on the ‘Ethernet’ option again and select ‘Search Device’. Your computer will then search for the PLC.
Select the new menu item which corresponds with your PLC (This will depend on which PLC you are trying to update e.g. PLCs connected to OFS Teltonika Routers will usually be on 10.17.X.X or 10.18.X.X) then select the Network tab.
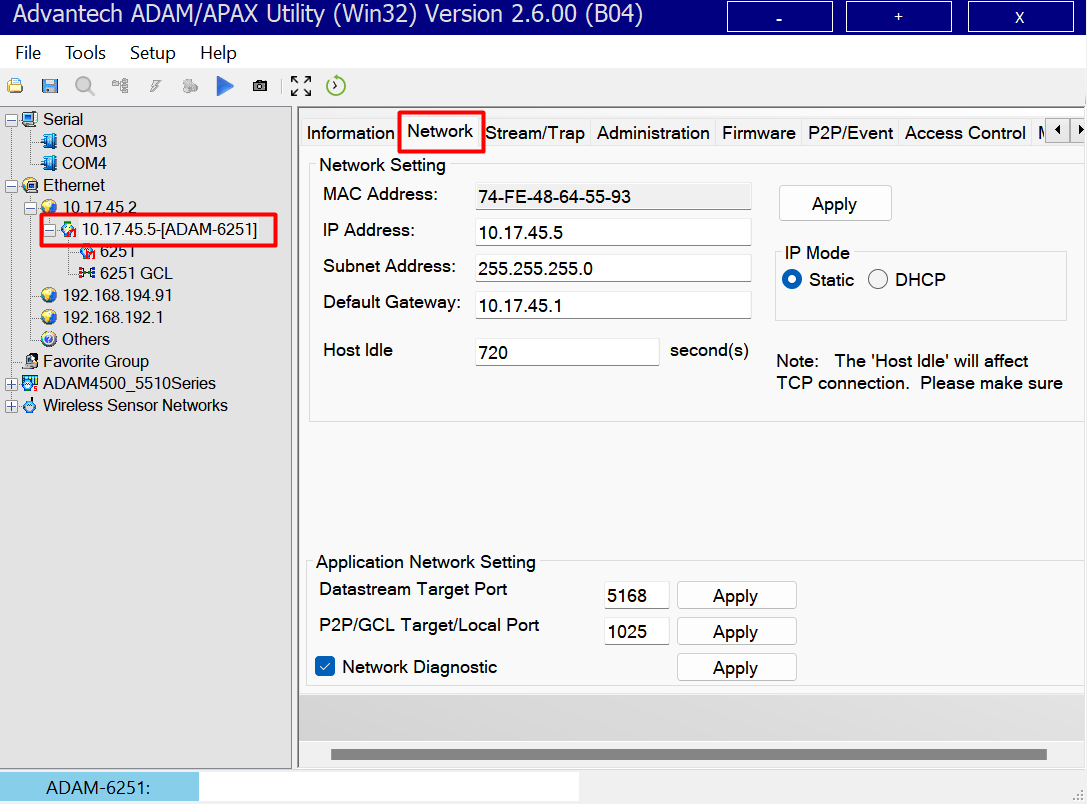
Here, you should be able to see the network settings which have been pre-configured.
Please let your OFS Representative know if you are unable to reach this page.
Updating Digital Filter / Debounce timings
Connect to the PLC as previously described and continue to expand the tree on the left-hand side of the screen, until you get a log-in prompt.
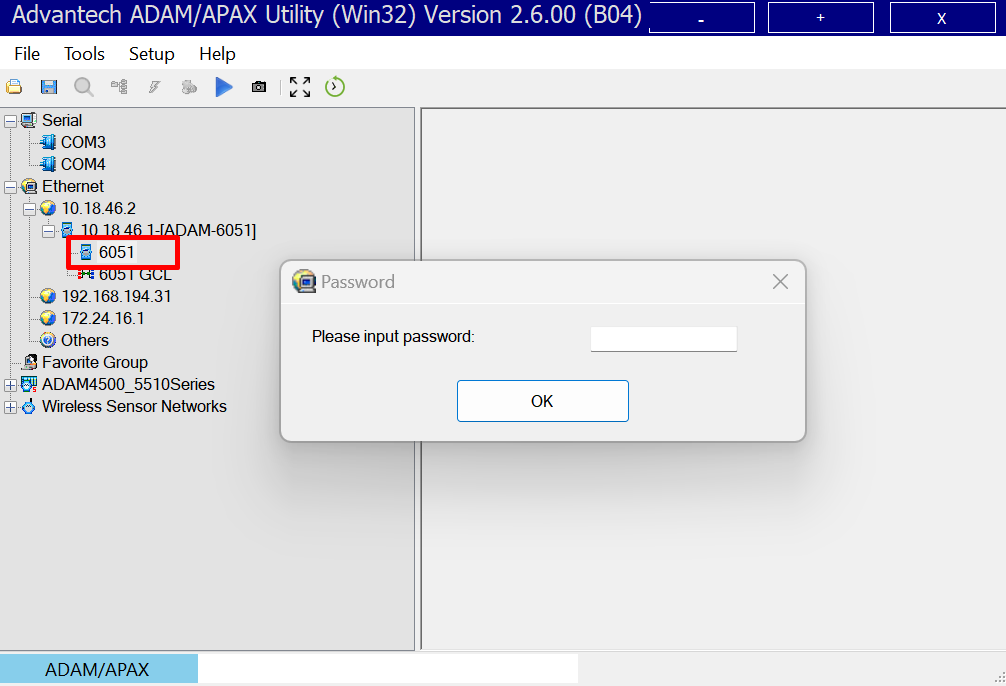
The default password for this is eight-zeros (‘00000000’).
Once logged in, you should be able to expand the tree a little bit further and select the DI channel that you wish to adjust (In this case it will be DI 0 through DI 2).

Here you can adjust the debounce time. Our default configuration is 10 * 0.1ms (which means we need to see a 1ms high, and a 1ms low signal). You can adjust this delay per channel, or click the ‘Apply to’ button to quickly apply the change to all channels.