![OFS_Circle.png]](https://support.ofsystems.com/hs-fs/hubfs/OFS_Circle.png?height=45&name=OFS_Circle.png)
Click here for the PDF document.
Click here for the walkthrough video guide.
What you'll build
- A planned downtime reason for the activity and a matching unplanned reason for the overtime
- A dedicated Analytics User the alert uses to authenticate
- A web service that reallocates the downtime to the overtime reason
- An alert with a Machine State trigger that fires once the target time has passed
Operators only log the planned reason. OFS handles the switch.
Before you start
Decide the following, because they set the values you enter later:
- Which planned downtime reasons should expire, and on which lines.
- The target time for each one, for example, 45 minutes from the start of the CIP.
Step 1 — Create the downtime reasons
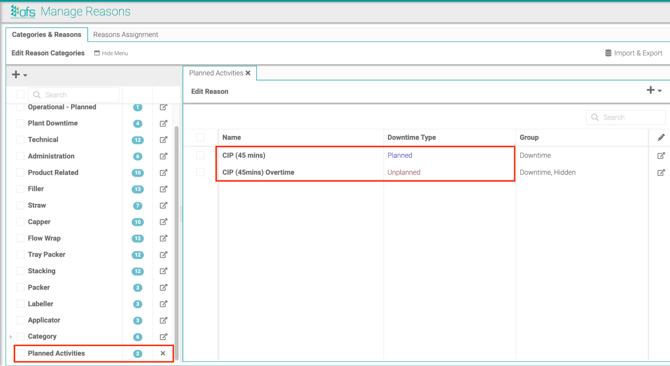
In Fusion Manager, open Reasons and add two reasons on the Categories & Reasons tab. In this example, we use a CIP with a 45-minute target:
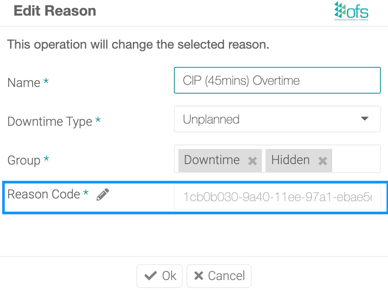
CIP (45 mins), with Downtime Type set to Planned. This is the reason the operator logs.CIP (45 mins) Overtime, with Downtime Type set to Unplanned. Add Hidden to its Group alongside Downtime so it stays off the operator's reason list.
Then assign both reasons to a line on the Reasons Assignment tab.
Step 2 — Create a user for the alert
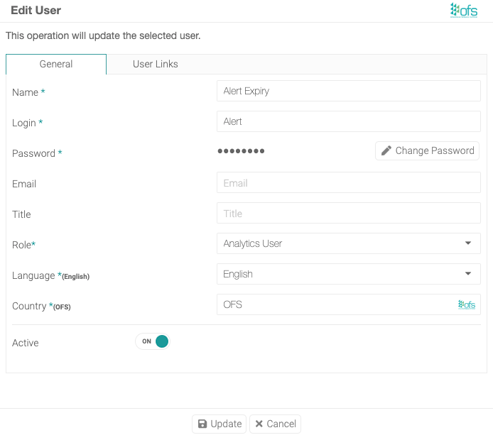
The web service needs credentials to log in with, so create a dedicated user rather than reusing a person's account.
- Go to the Users & Operators tab.
- Enter a Name, Login and Password
- Set Role to Analytics User, leave Language and Country as they are, and set Active to on.
- Select Update.
Step 3 — Create the web service
You need one web service per unplanned downtime reason.
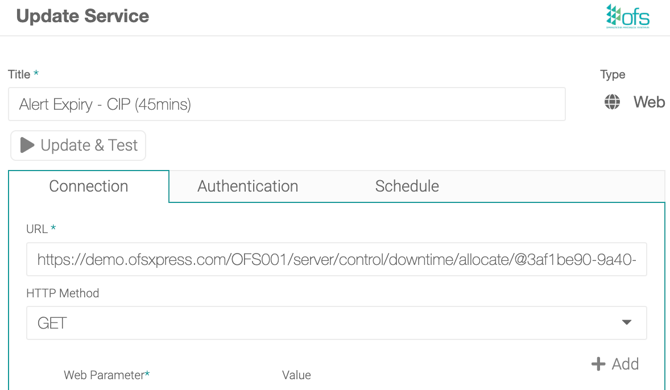
Go to the Services tab, select Web, and create a new service with a descriptive title, for example Alert Expiry - CIP (45mins).
On the Connection tab, set HTTP Method to GET and enter this URL with your own details:
https://customer.ofsxpress.com/WorkcentreID/server/control/downtime/allocate/@reasoncodecustomeris the name of your organisation. If your OFS runs on a local server, replacecustomer.ofsxpress.comwith the server IP address, for examplehttps://10.123.456.78/WorkcentreID/server/control/downtime/allocate/@reasoncode.
WorkcentreIDis the OFS line identifier, for exampleOFS001. You'll find it in Fusion Manager or in the Operator Console page URL.
To cover multiple lines with one service, use{{workcentre}}in place of the line identifier.reasoncodeis the Reason Code on the unplanned overtime reason you created in step 1. Open that reason in Reasons and copy the value from the Reason Code field.
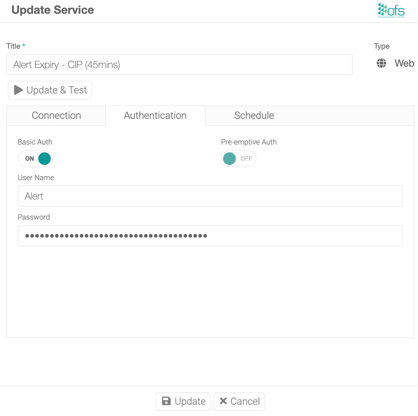
On the Authentication tab, turn Basic Auth on and enter the User Name and Password from step 2. Leave Pre-emptive Auth off. Select Update & Test to check the connection, then Update to save.
Step 4 — Create the alert
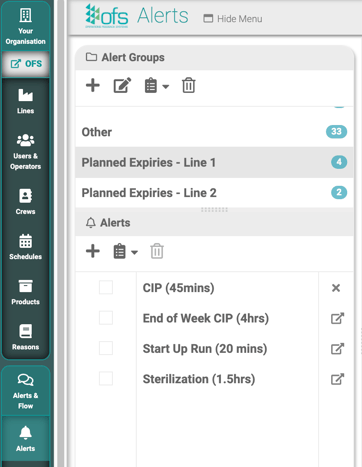
- Go to the Alerts & Flow tab, then Alerts.
- Create an Alert Group for this type of alert, for example
Planned Expiries. - Create an Alert inside that group, named after the activity and its target time, for example
CIP (45mins).
Step 5 — Add the machine state trigger
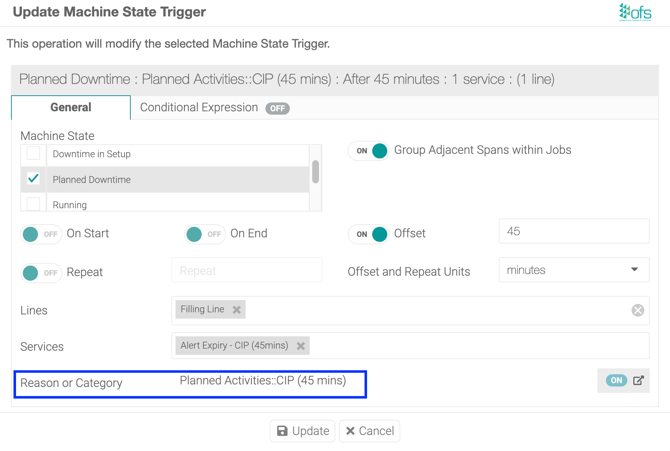
Open the alert you created, go to the Triggers tab and select Machine State, then add a trigger.
- In the Machine State list, tick Planned Downtime.
- Toggle Group Adjacent Spans within Jobs on.
- Toggle Offset on and enter the target time, for example
45. Set Offset and Repeat Units tominutes. - In Lines, select the lines this applies to.
- In Services, select the web service from step 3.
- In Reason or Category, select the planned downtime reason from step 1, for example
Planned Activities::CIP (45 mins). - Leave On Start, On End and Repeat off, then select Update.
Test it
On the line you configured, log the planned reason on the Operator Console and leave the line down past the target time.
- Up to the target time, the machine state shows the planned reason.
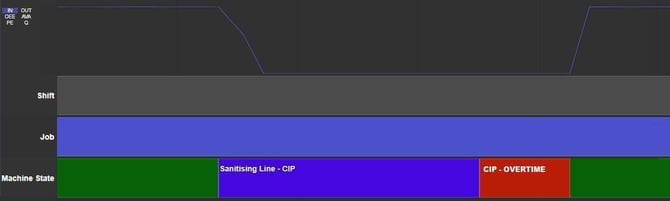
- Once the target time passes, OFS allocates the remaining downtime to the unplanned overtime reason. On the event chart, the planned span ends and an overtime span begins.
The switch only happens if the planned downtime reason is selected within the target time. If the operator logs the reason after the target has already passed, the trigger has nothing to expire.
Adapting it to your own lines
- One web service per unplanned overtime reason. Two activities expiring to two different reasons need two services.
- One alert and trigger per planned activity, since each has its own target time.
- To use one service across several lines, swap the line identifier for
{{workcentre}}in the service URL and select all the lines in the trigger. - The same approach tracks job setups that run long. See the setup expiry article on the Customer Portal.