Note: Before logging a job, operators must first log a shift. Please refer to this article on how to do this.
Logging the start of a Job
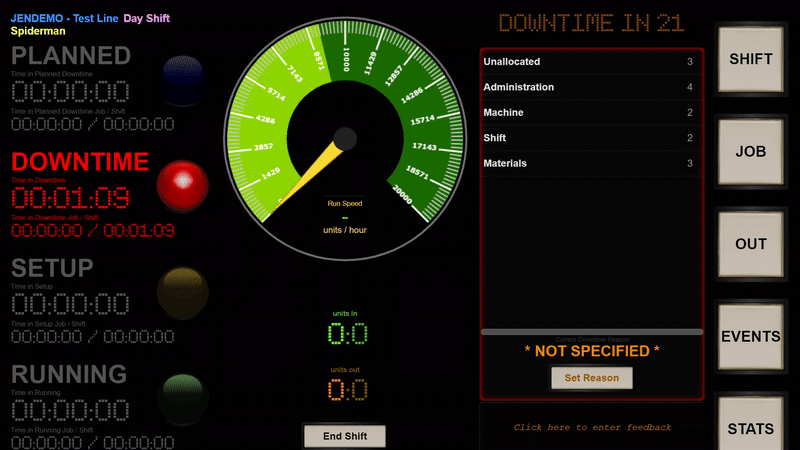
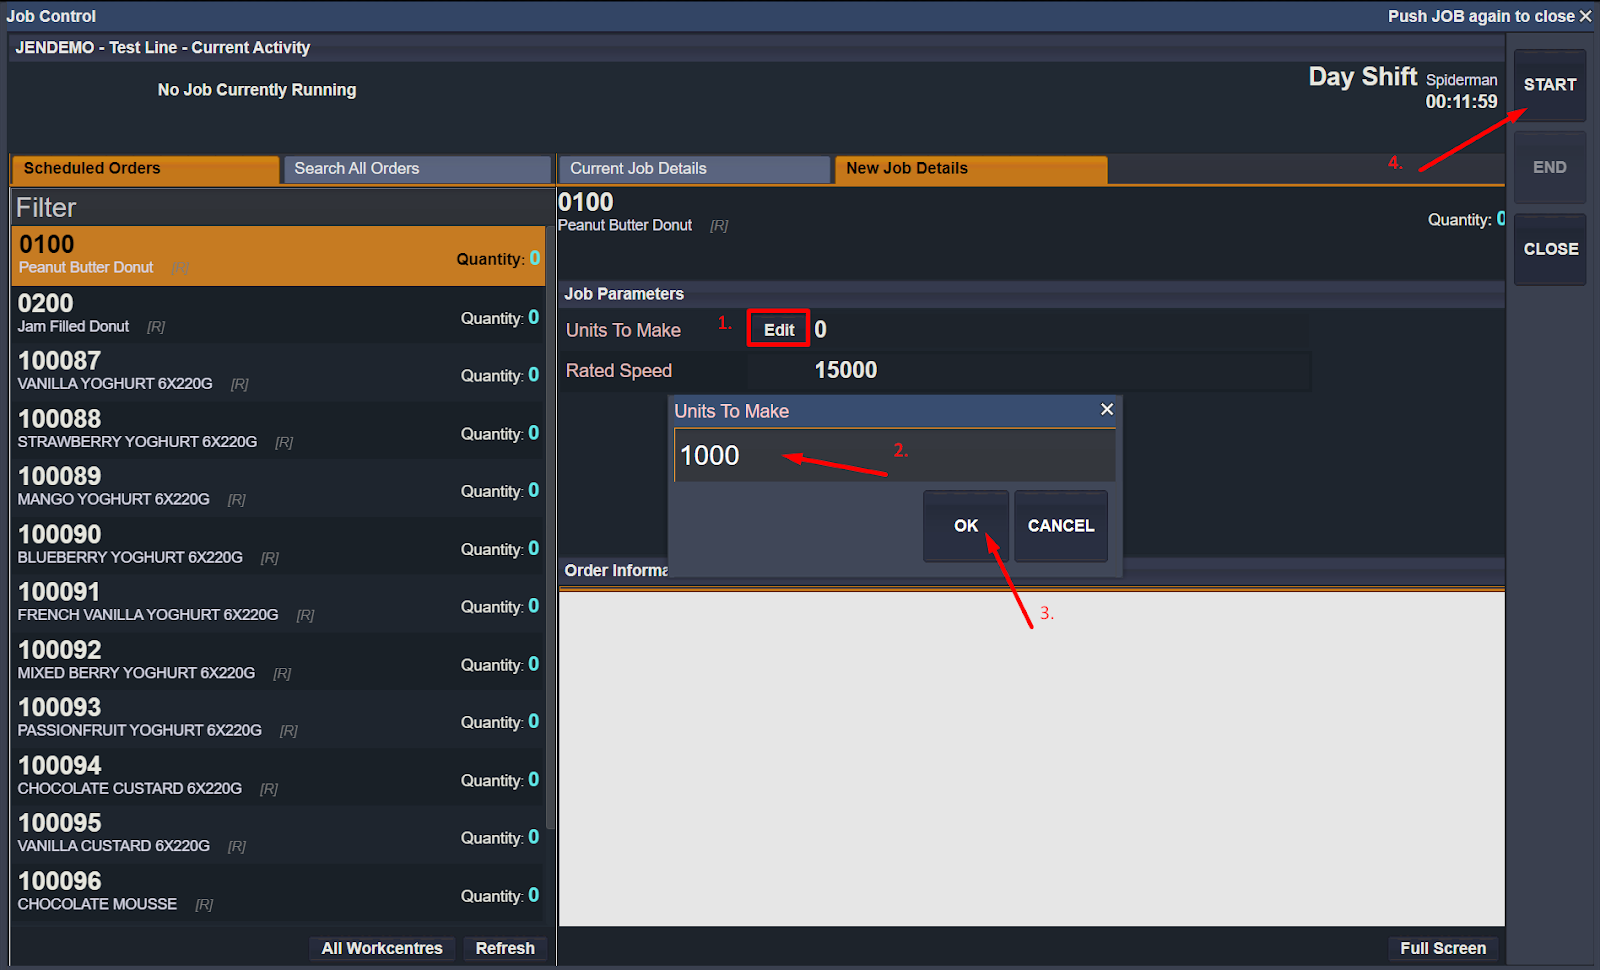
From the Console, click the flashing red JOB button.
This opens up a dialogue box that allows operators to select the following:
- Select the Product
- Use the ‘Filter’ bar to search for any product

- Enter the Units To Make quantity by clicking ‘Edit’
- Click OK and then Start
Ending a job
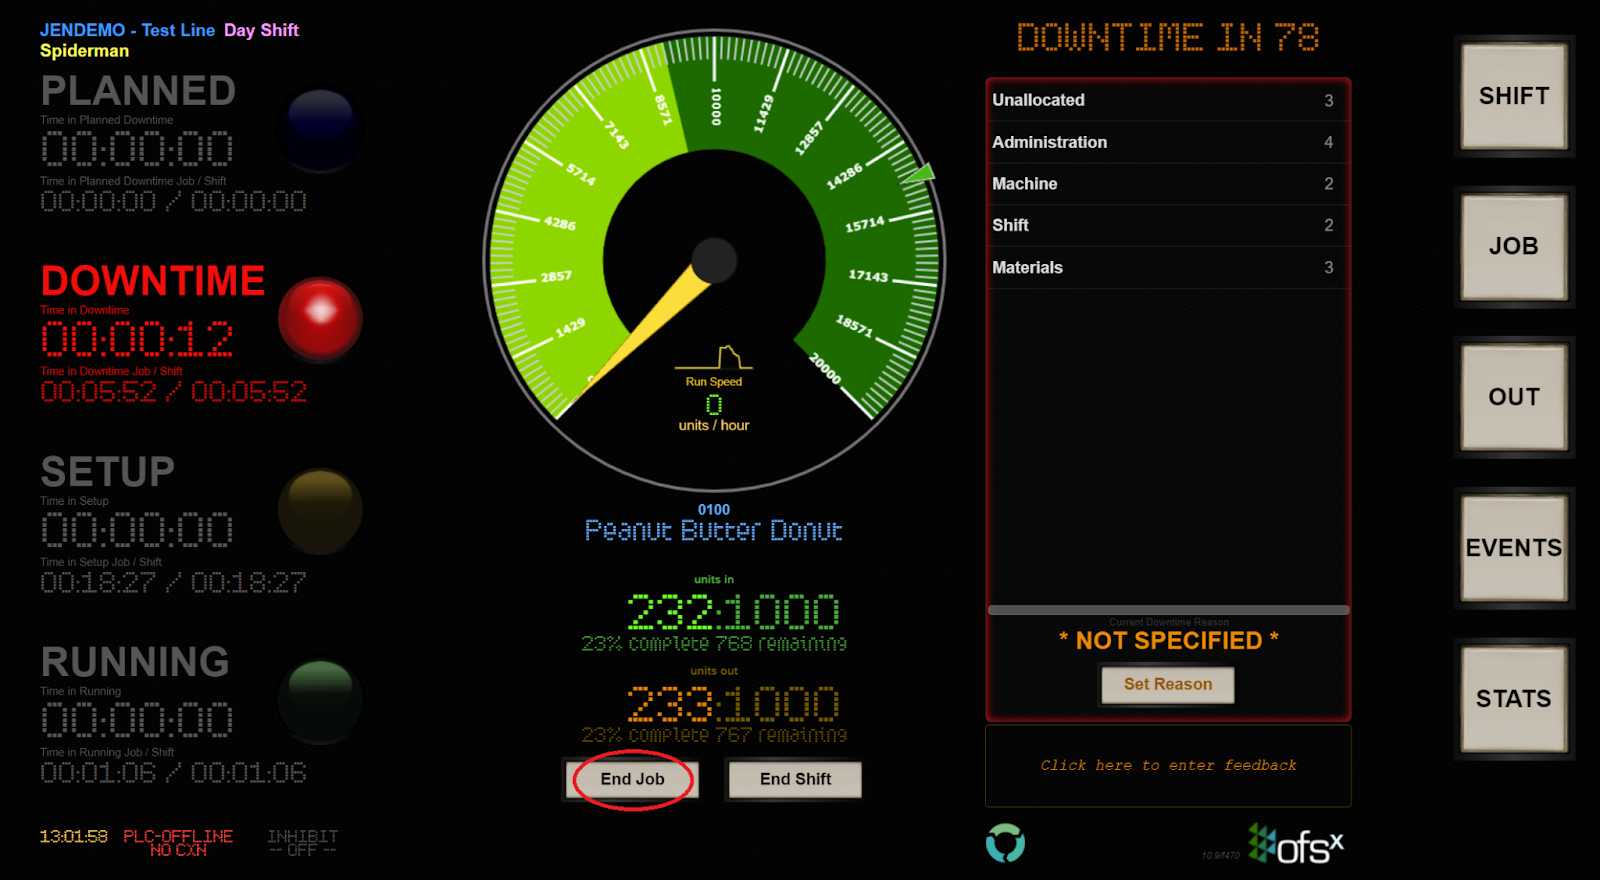
The End Job button will appear when OFS has registered that the production line has stopped and is in a downtime.
Simply click the End Job button to end the job.
What if the ‘End Job’ button disappears?
The End Job button disappears after 90 seconds to ensure that operators are diligently ending shifts and jobs.
If the End Job button disappears, a downtime reason must be allocated.
Step 1 - Select a Downtime Category.
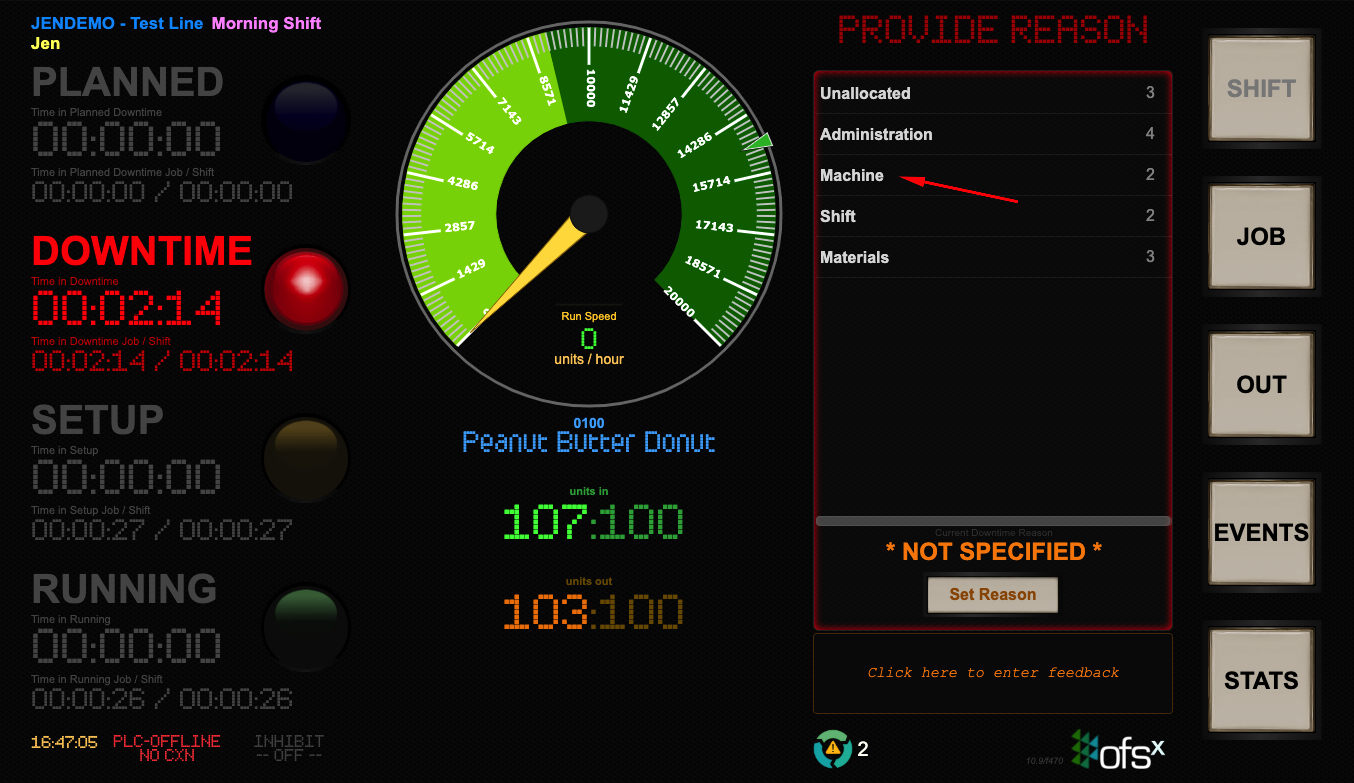
Step 2 -Select the Reason.
Step 3 - Click Set Reason.
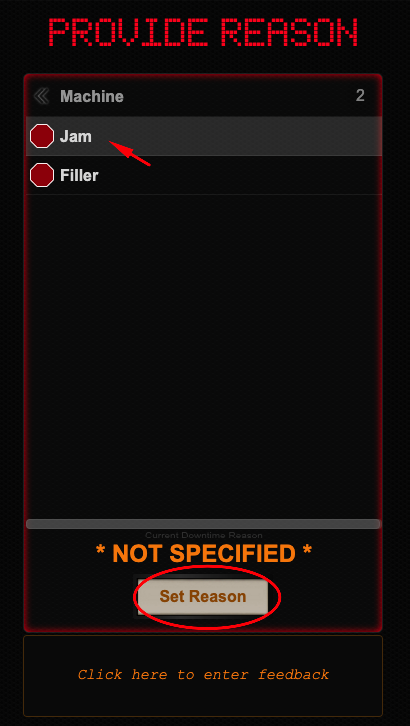
Step 4 - Click the End Job button.

What if there is a new job immediately after the current job?
In this instance, the new operator lead just needs to log the new job. This will automatically end the previous job.
Note: The production line does not have to stop or be in a downtime to log a new job.
Step 1 - Click the JOB button (Note: The JOB button will NOT be flashing red)

Step 2 - Select the Product.
Step 3 - Enter the ‘Units To Make’ quantity.
Step 4 - Click OK and then Click Start.
Find the explanation video here.