![OFS_Circle.png]](https://support.ofsystems.com/hs-fs/hubfs/OFS_Circle.png?height=45&name=OFS_Circle.png)
What you'll build
Four pieces work together. All four have to exist before anything happens.
- A service user, so the alert can authenticate back into OFS.
- An unplanned downtime reason, which the line moves to when the setup expires.
- A web service, which is the call that performs the move.
- An alert trigger, which watches the setup and fires the web service once the target time is passed.
If your target setup time is the same across every SKU, Steps 1 to 10 are all you need. If it varies by SKU, continue from Step 11.
Note: If a new shift or job is started during a setup, the counter will reset.
When OFS transitions out of setup into another downtime or running, the counter will also reset.
Step 1 — Create the service user
The web service in Step 4 authenticates as this user, so it needs to exist first. Navigate to the Users & Operators tab and add a user:
- Name: Alert Expiry
- Login: Alert
- Password: set one and record it for Step 6
- Role: Analytics User
Step 2 — Create the downtime reason
Create the unplanned downtime reason in your reason list in Fusion Manager:
- Name it, for example Overdue Setup
- Downtime Type: Unplanned
- Group: Setup & Hidden
- Reason Code: rename it if you want a code that's easier to read
Click the pencil icon and copy the reason code. You need it in Step 5.
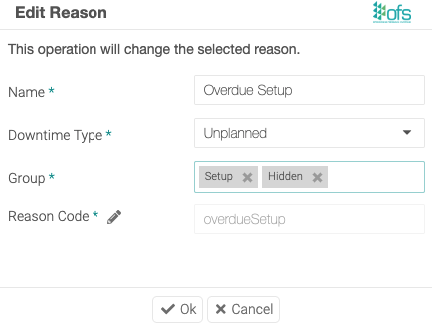
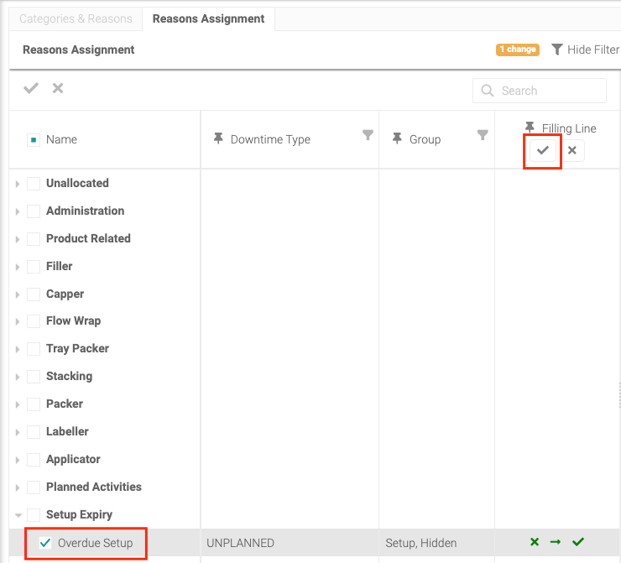
Step 3 — Assign the reason to your lines
Open Reasons Assignment and assign the new reason to every line that will use the setup expiry.
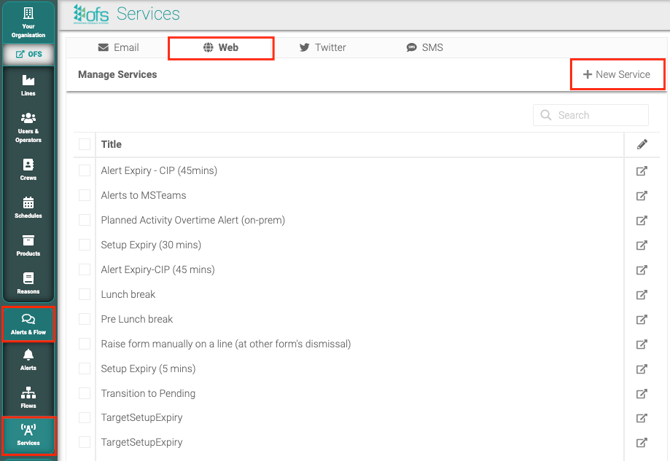
Step 4 — Create the web service
Navigate to the Services tab, click Web, and create a New Service.
Step 5 — Enter the service URL
In the URL field, enter the following:
http://localhost/{{workcentre}}/server/control/downtime/allocate/@reasoncode
- Replace
@reasoncodewith the reason code you copied in Step 2. - Leave
{{workcentre}}exactly as it is, so the call is directed at the line that triggered the alert.
Step 6 — Add authentication
Navigate to the Authentication tab and enter the login and password from Step 1.
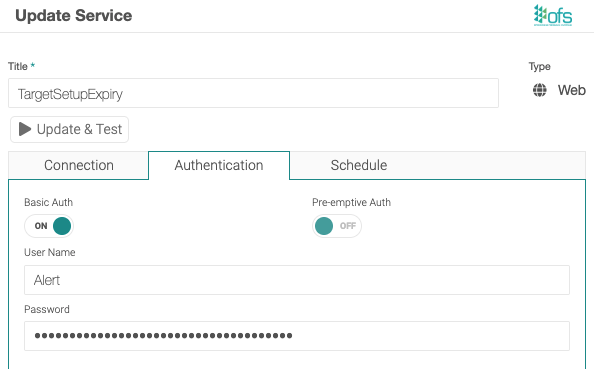
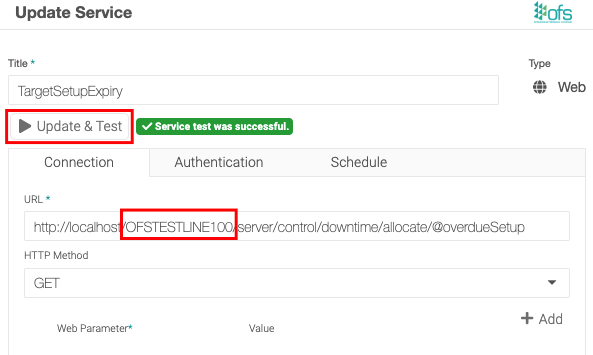
Step 7 — Update and test the service
To test the service you need a real line in the URL, because the placeholder only resolves when an alert fires.
- Temporarily replace
{{workcentre}}with a workcentre ID, for exampleOFS001. - Click Update and run the test.
- Change it back to
{{workcentre}}once the test passes, and update again.
Step 8 — Create the alert group and alert
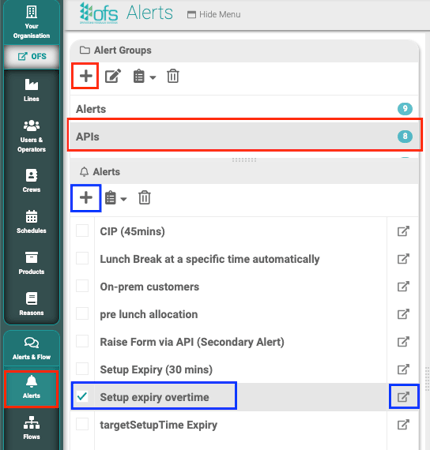
Navigate to Alerts & Flow:
- Create a dedicated alert group, for example Alert Expiries
- Inside that group, create a new alert and name it
- Click the expand icon to edit the alert
Step 9 — Add a machine state trigger
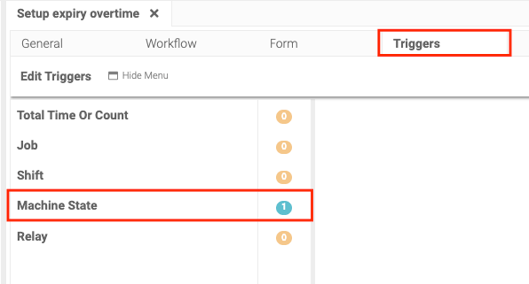
In the alert, go to the Triggers tab, click Machine State, then click the + to add a trigger.
Step 10 — Configure the trigger
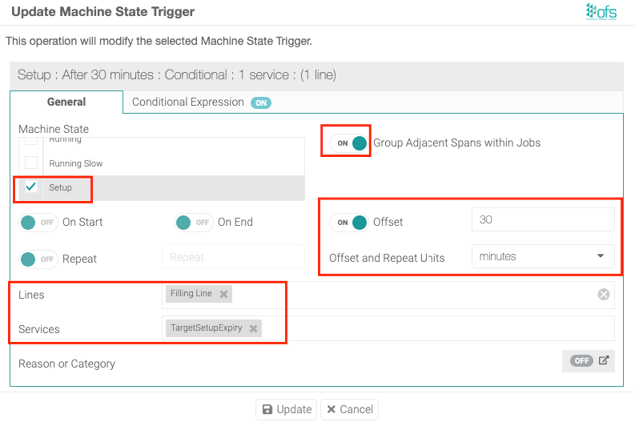
Fill in the following:
- Machine State: tick Setup
- Toggle on Group Adjacent Spans within Jobs
- Toggle on Offset and enter the target setup time
- Set the units: minutes, hours or counts
- Select the lines
- Select the service you created in Step 4
If every SKU on the line shares the same target setup time, you're finished. Skip to Test it.
If setup times vary by SKU
Steps 11 to 15 add a target setup time per product and one trigger per variation. Read all five before you start, because the offset in Step 10 and the value in Step 14 have to agree.
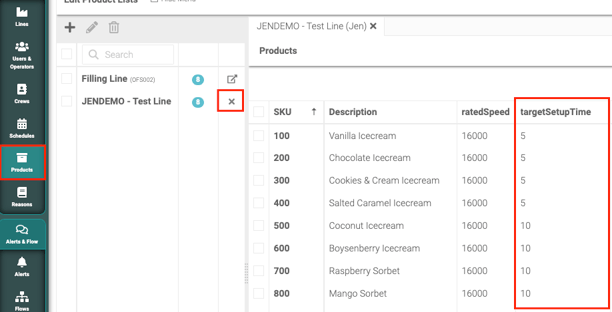
Step 11 — Add the target setup time to the products list
In the products list, fill in the targetSetupTime column for each SKU.
Enter the value in the same units you selected in Step 10. If the trigger offset is set in minutes, targetSetupTime is in minutes.
Step 12 — Make the field editable for operators (optional)
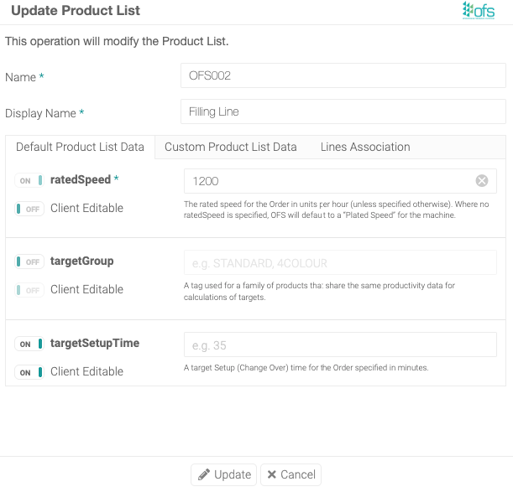
Use this when the setup time isn't known in advance and the operator sets it at the start of the job.
- Navigate to Products
- Tick the line
- Click the pencil icon
- Under Default Product List Data, toggle on
targetSetupTime, then toggle on Client Editable
Step 13 — Enter the target setup time on the Operator Console
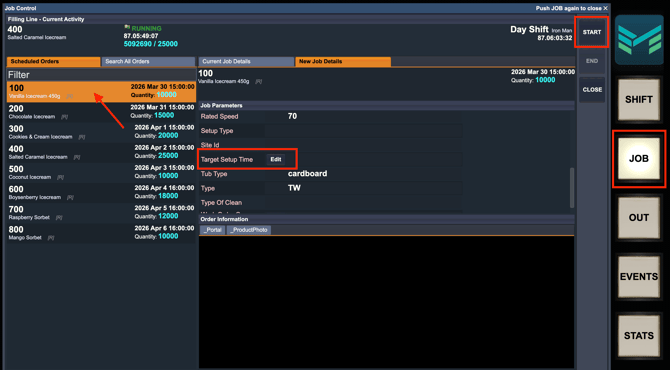
Only needed if you turned on Client Editable in Step 12. Until an operator enters a value, the field is blank and no trigger will match.
On the Operator Console, press the JOB button, select the job, enter the target setup time in the targetSetupTime field, and save.
- Enter the value at the start of the job. The trigger reads the value from the job, so a setup that begins before the value is entered won't be picked up.
- Enter it in the same units as the trigger offset in Step 10.
- The value has to match one of your triggers exactly. If you've built triggers for 30, 60 and 90 minutes and an operator enters 45, nothing fires.
Step 14 — Add the conditional expression to the trigger
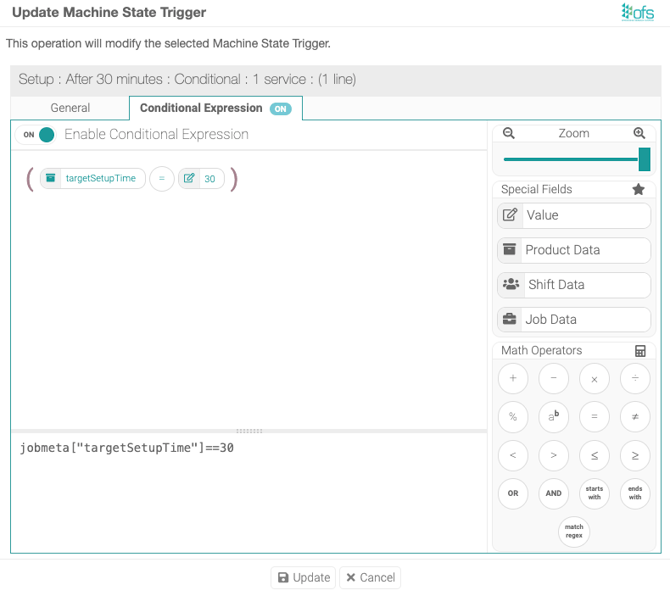
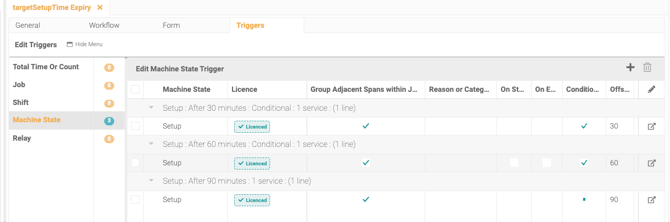
In the alert trigger, go to Conditional Expression, toggle it on, and enter the expression. Change the value to match the setup target time for this trigger:
jobmeta["targetSetupTime"]==30
The number in this expression and the Offset you set in Step 10 must be the same. The expression decides which jobs the trigger applies to, and the offset decides how long it waits. A trigger with a 30 minute offset and an expression looking for 60 will not behave as intended.
Step 15 — Repeat for every variation
Create one trigger per setup time you use. For 30, 60 and 90 minute setups you need three triggers, each with its own offset and its own conditional expression. Follow Step 9 onwards for each one.
Test it
On a line you've configured:
- Put the line into setup and leave it there past the target time.
- Confirm the line moves into your unplanned downtime reason, for example Overdue Setup.
- Check the downtime appears in Analytics against that reason.
If nothing happens, work through these in order:
- The reason isn't assigned to that line (Step 3).
- The service test failed, or
{{workcentre}}was left as a hard coded workcentre ID after testing (Step 7). - The SKU has no
targetSetupTimevalue, or it doesn't match any trigger (Steps 11 and 13). - The trigger offset and the conditional expression value don't match (Step 14).
- A new job or shift started mid setup, which resets the counter.