Logging in to Fusion Manager
Step 1 - Visit OFS Fusion Manager: https://yourcompanyname.ofsxpress.com/manager
Step 2 - Login to OFS Fusion Manager:

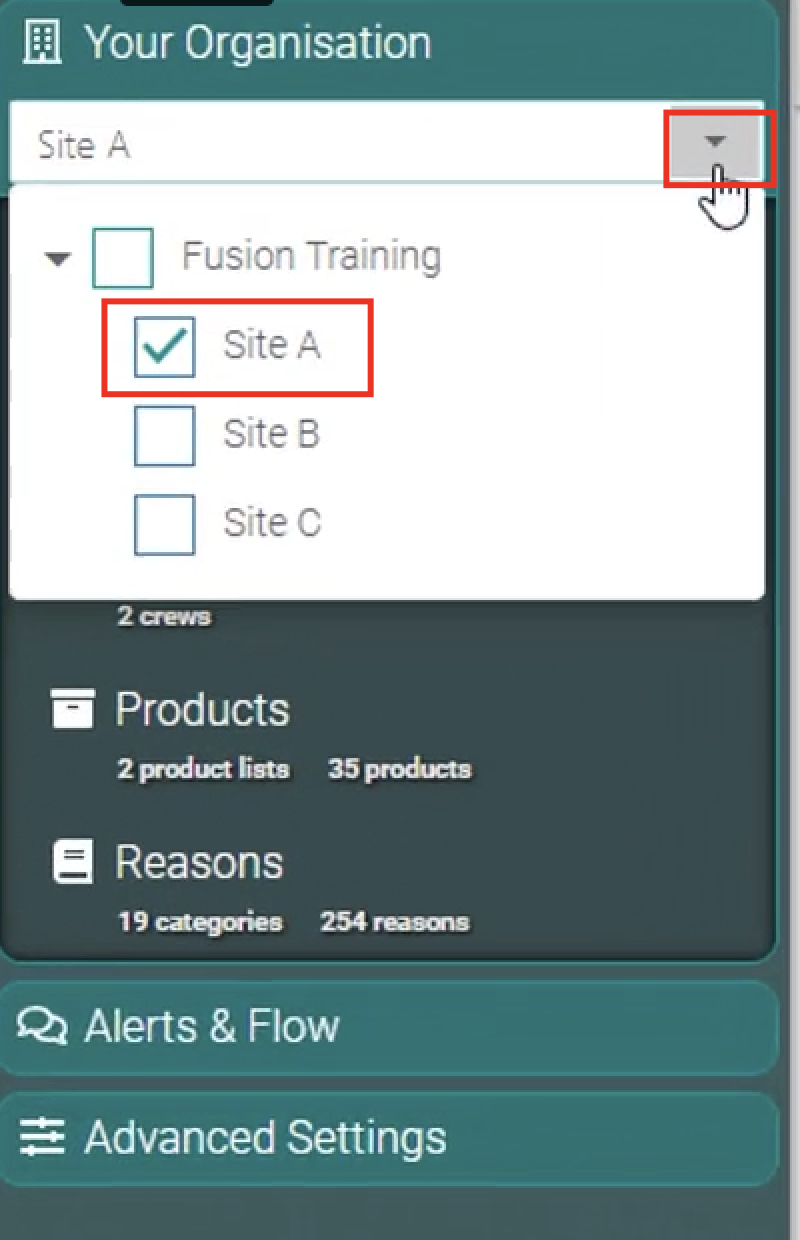
Step 3 - Select your organisation by clicking from the drop down.
Storing the images with a shareable link.
Before we input the image into OFS, we first need to store the image in a location that has a shareable link. In this instance, we use Google Drive and Google Docs as this has been tested. Other services may be storing it in the OFS server.
Note: Other image formats and storage platforms may not work as we are yet to do testing.
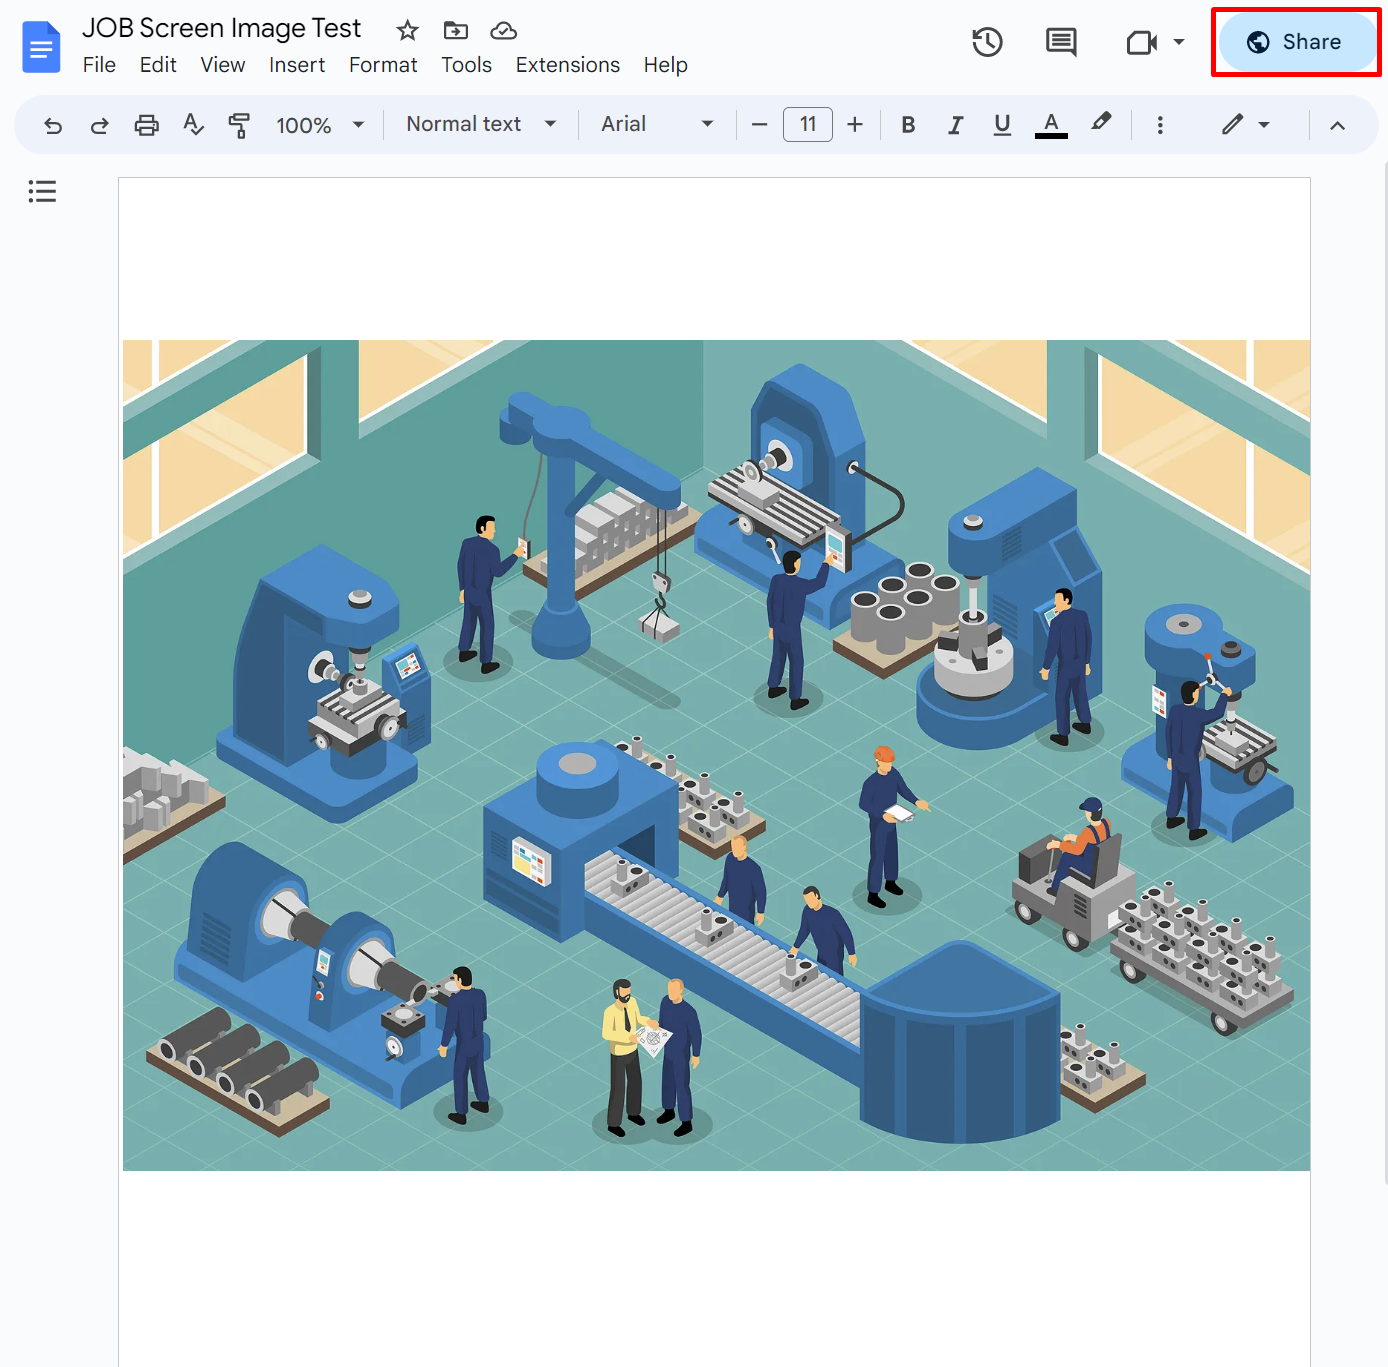
Step 1 - Select the image you’d like to appear in the JOB screen and paste it into a Google Doc.
Step 2 - Click “Share” and copy the link.
Adding the image to the JOB Screen.
Step 1 - From Fusion Manager, go to 'Products'.
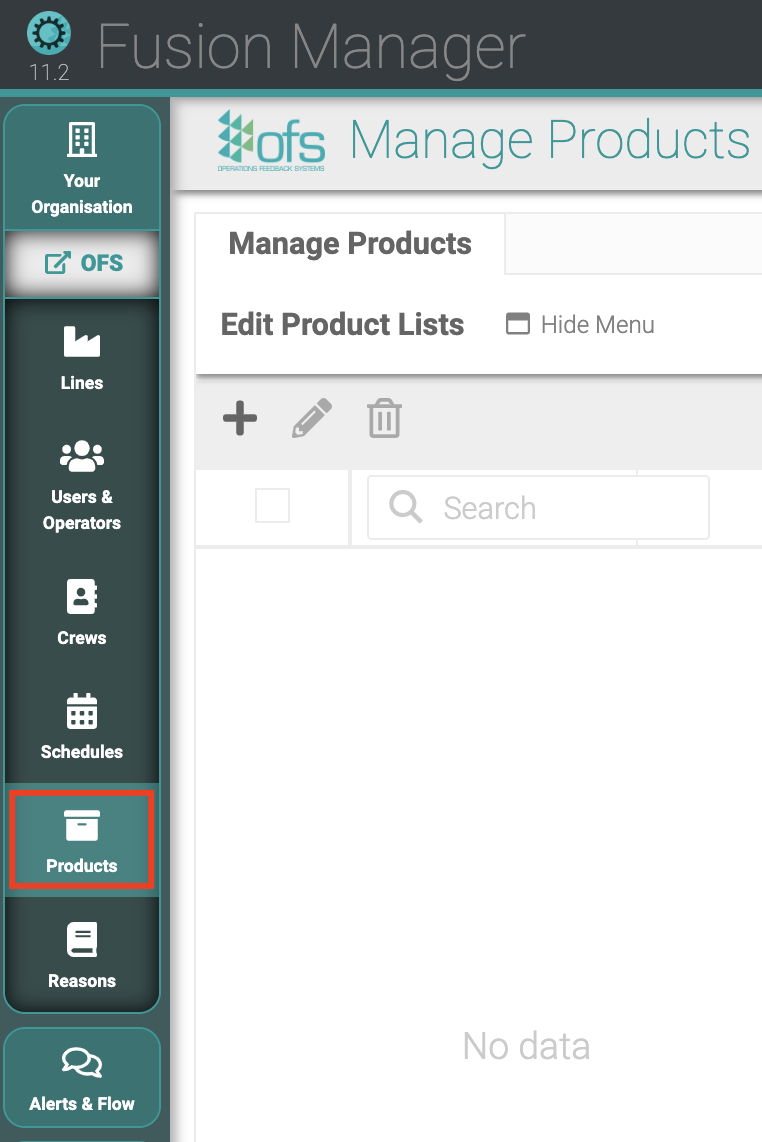
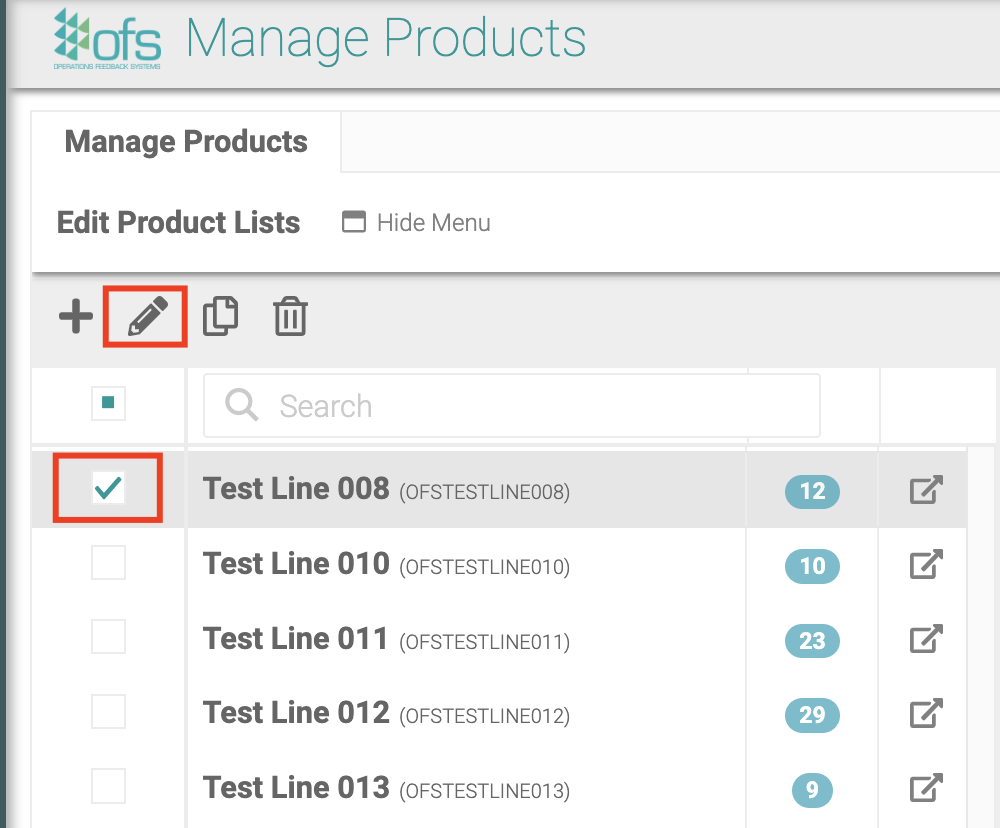
Step 2 - Tick the line you want to add product images to and then click the pencil icon to edit.
Step 3 - Click "Custom Product List Data" and "Add Variable".
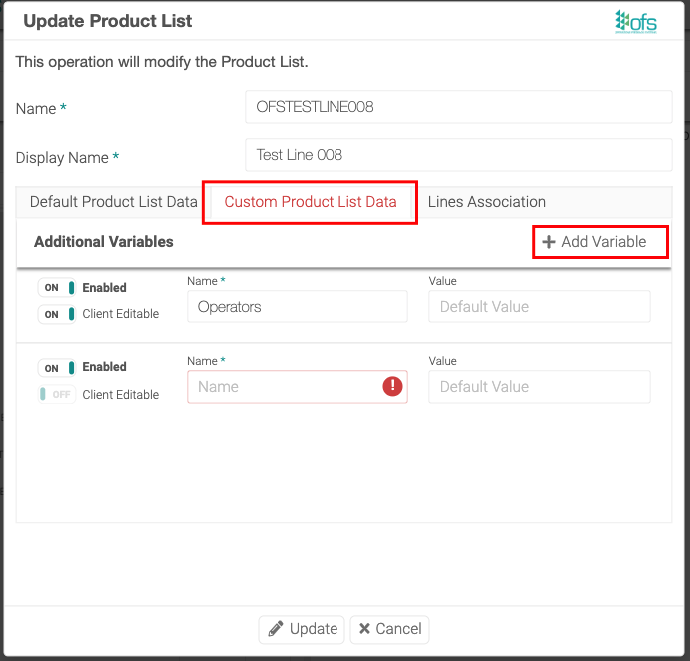
Step 4 - Enter “infolink_” followed by a name. In this example it is infolink_ProductPhoto
Note: The first letter of the first word must be lowercase and the first letter of the second word must be capital and so on. E.g. infoProductPhoto
Step 5 - Input the URL link to the google doc in the column via the Import & Export button or via exporting into a CSV file.
Step 6 - Click "Import" and "Save" changes.


Now, when an operator selects a job in the OFS Console, the image will appear:
